How to Develop Your WordPress Site on a Temporary URL
When migrating WordPress to Fast2host or building a new site while your domain is still hosted elsewhere, you may need to use a temporary URL. This allows you to fully test and develop the website before updating your nameservers or DNS.
Common symptoms that indicate you need to use the temporary URL include:
- Your domain name has not yet propagated to Fast2host.
- Your site loads without styling (plain text, missing CSS or images).
- You cannot log in to wp-admin because the login redirects to your real domain.
- WordPress settings still point to your old/active domain rather than the temporary URL.
1. Changing WordPress to Use the Temporary URL
WordPress stores your main website URLs inside the database. To preview your site through the temporary URL, you must modify two fields in the wp_options table:
- siteurl — WordPress core address
- home — Public-facing site address
Step A: Identify Your WordPress Database
If WordPress was installed via Installatron, the database name may look like username_wp1.
- Log in to cPanel.
- Scroll to the Databases section.
- Select phpMyAdmin (sailboat icon).

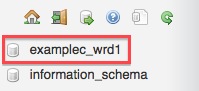
Inside phpMyAdmin, click your WordPress database name on the left-hand sidebar:
Step B: Edit the siteurl Value
Click the table named wp_options (or similar if you use a different table prefix), then click Browse.

Look for the row with option_name = siteurl. Click the Edit (pencil) icon on the left.

You’ll see your real domain in the value field:

Replace it with your temporary URL, following this format:
http://site-ip-address/~cpanelusername/Example from the screenshot:

Click Go to save your changes.
Step C: Edit the home Value
Click the Next button in phpMyAdmin to browse more rows until you find home.

Change this value to match your temporary URL exactly as before, then click Go.
2. Test Your WordPress Temporary URL
Your site should now work correctly via the temporary URL. Visit:
http://site-ip-address/~cpanelusername/You can also access the WordPress dashboard via:
http://site-ip-address/~cpanelusername/wp-admin/The theme, styling, and images should now load correctly because WordPress is no longer redirecting to your real domain.
3. Switching Back to Your Real Domain
After updating your nameservers and DNS has propagated, you must update WordPress to use your final domain again.
Method A: Change URLs from WordPress Admin (Recommended)
- Log in to wp-admin via the temporary URL.
- Go to Settings → General.
- Update both fields:
- WordPress Address (URL)
- Site Address (URL)

Enter your final domain, for example:
https://www.yourdomain.com/
Click Save Changes.
Method B: Update URLs in phpMyAdmin (Alternative)
If WordPress admin is inaccessible, repeat the earlier database steps:
- Open phpMyAdmin.
- Edit siteurl and home again.
- Replace the temporary URL with your real domain:
https://www.yourdomain.com/ - Click Go to save.
4. Final Notes
- Clear WordPress cache if you use a caching plugin.
- Clear your browser cache after switching URLs.
- Full DNS propagation may take 24–48 hours.
- If any URLs still point to the temporary address, run a search-and-replace plugin inside WordPress.
Optimised WordPress Hosting for Maximum Speed
Boost your website with our high-performance WordPress hosting, automatic updates, premium toolkit & built-in security.
View WordPress Hosting →